SOCIAL MEDIA

Tuesday 28 February 2017

Bookcase Builder Cards

I brought the Bookcase Builder Stamp set for when I am making 3D cards, in particular cards that look like the interior of rooms in a house. Seeing I haven't made one of those cards since I got this set, I felt I needed to ink it up and make some basic cards.


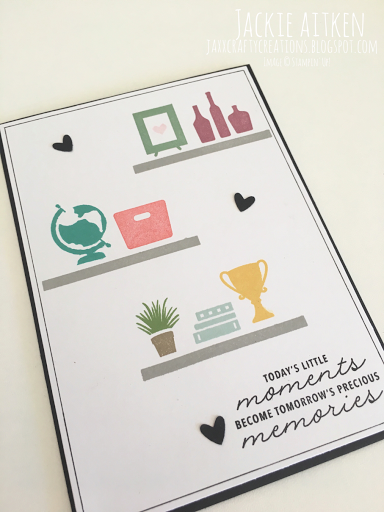
I stamped everything onto Whisper White card stock including the sentiment. I added a thin black line around the edge with a journaling pen before adhering to a black card base. Little hearts are made using the Owl Punch.


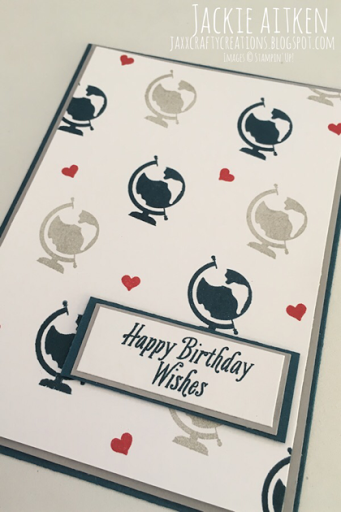
I cased this card from Kylie Bertucci, just changing the card dimensions and sentiment. Isn't it just dandy! Great for males or the jet setting travellers in your life. I have used Smoky Grey and Dapper Denim card stock with the stamped images in coordinating ink on Whisper White.


Another simple and basic card I cased from Kylie Bertucci. I added a simple scored border and an enamel shape in the picture frame.  I love the Emerald Green.


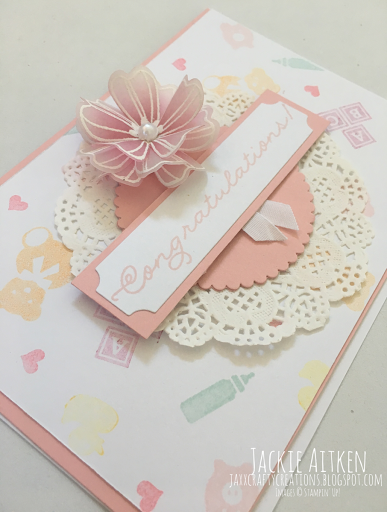
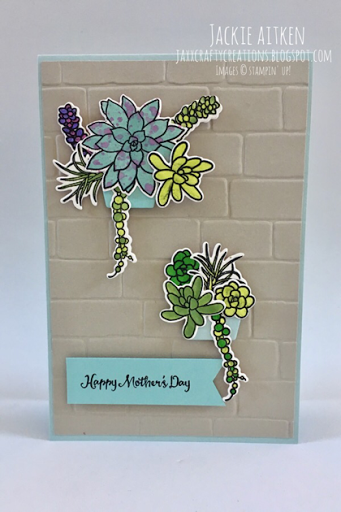
Congratulations Baby Cards, using the Bookcase Builder stamps inked in various colours and stamped off to give a subtle effect for the card fronts. Vellum flower was made using the Flower Shop Bundle. I heat embossed the flowers in white, sponged colour on the reverse side, cut petals down to centre more then curled with a pencil and adhered 3 layers with Tombow. 


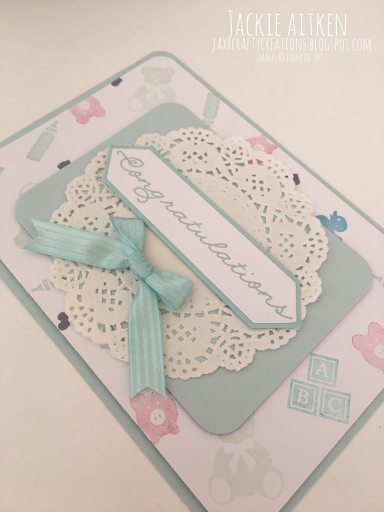
I used Blushing Bride, Pool Party & Whisper White card stock then added some doilies and ribbon. Stamp sentiment in coordinating ink colours and voila done - Very quick and easy! 

I can't wait to use the Bookcase Builder for what I brought it for - 3D cards.  But for now these types of cards are going to have to wait while I work on something else.

April is just around the corner and that means I only have 5 weeks to prepare for my first Stampin' Up! Convention (insert excited squeal here) I'm absolutely elated as this one is in Perth....which is great for me as I don't fly well, so I don't get to attend the Conventions over east.  I'm also massively stoked I get to attend the one in April, as we Demonstrators get to see all the new product but most exciting for me is the release of the new In Colours! 

I do have a few exciting cards to share in my next few posts, so hope you return to check out what my next crafty creations will be. Till then....

Happy Crafting xx

Monday 27 February 2017

Magic Reveal Spinner Card with Beautiful You

One of the perks of being an Independent Stampin Up Demonstrator is the community of inspirational and talented people willing to share their knowledge, skills and the enjoyment of stamping.  A few weeks ago a very talented Australian Demonstrator by the name of Tanya DeRoy from Ink Responsibly shared a wonderful tutorial. It's called a Magic Reveal Spinner Card. You can find her tutorial on you tube. https://www.youtube.com/watch?v=ED1lo42QLlM

This is how the card looks to begin with......


Then as we start pulling the ribbon the image starts to disappear
 

Just about there...............


Oh look her umbrella has gone and is replaced with a dancing girl wearing a sun hat!


Here is a close up. I have stamped the lady image twice. Once on the Whisper White Card stock and then on DSP. Fussy Cut the DSP and adhere with tombow to the stamped image on the WW.


For how amazing the effects of this card are - its not that hard if you follow Tanya's instructions. This was my first and now I know how it works and whats required I am definatley making more of these in the future.

Hope my card inspires you to look up Tanya's tutorial on you tube and give it a go.

Happy Crafting x


Sunday 26 February 2017

Snail Mail Better than E-Mail

Can't beat snail Mail!!

I totally agree. There is nothing nicer than going to retrieve the mail, and instead of bills, pamphlets or advertising, finding handwritten envelopes with cute stamped images.


This bright and cheerful card has loads of colour, inside and out. The middle panel was sponged with Rich Razzleberry, Bermuda Bay, Daffodil Delight, Peakaboo Peach and Melon Mambo. 

The card base has ink splotches achieved using a piece of acetate and flicking off the edge with an aqua painter that has been dipped in ink. I tried to flick the colours in the order that the sponged panel in the middle had been coloured.  With the off cuts of the sponged panel, I die cut the balloons and adhered with dimensionals. The sentiment is from Blooms & Wishes.  Simple die cut Hot Air Balloon from the Up & Away Bundle and some bling. 

Also don't forget to stamp your envelopes. Such a lovely touch when looking at a pile of mail and there is something colourful and fun standing out amongst the plain white ones. I used the Better than Email stamp set for the cute little snail on my envelope. 


This card uses the same techniques as above, minus the Rich Razzleberry and stamped sentiment on the bottom. I shifted the sponged panel to the side and die cut 3 butterflies from the Bold Butterflies Framelits. A bit of bling on the Butterflies and a stamped sentiment using Black Archival on Bermuda Bay card stock.

Hope you get into your crafty space sometime soon and make some Better Than E-Mail surprises for your friends and family - a lovely handmade card from someone you love is bound to put a smile on their dial.

Happy Crafting x
Saturday 25 February 2017

Mothers Day Cards

 I have made several Mother's Day Cards this year, one for my Mumma, one for my Mumma in law and also a few for friends who wanted to send their cherished Ma's a handmade card - go the snail mail!!


This card uses the Oh So Succulent stamps and dies to make the 3D Succulent and the water coloured images. I also used the Happy Mother's Day sentiment from the set and die cut it using the Project Life Cards & Labels Framelits. The Wood Grain Background stamp was stamped on Pool Party card stock using Crumb Cake ink before adhering to a Crumb Cake card base.


I took a piece of Whisper White A4 card stock and stamped a whole heap of the different stamps from the Oh So Succulent Stamp Set to make my own DSP. I then cut up the DSP to make four card fronts. On this card I used Sweet Sugar Plum card stock as a base for the card front and to cut the scalloped circle for the sentiment.  Little succulents were adhered with dimensionals to the bottom of the sentiment. 


Little pots on a brick wall! Using the Oh So Succulent bundle again raised on dimensionals with a little pot underneath. I used Pool Party & Sahara Sand card stock and Shimmery White card stock for the water coloured succulents. The Brick Wall Embossing folder was used for the card front.


This one is a little different. The Everyday Hero stamp set was used along with the Happy Hearts & Confetti Embossing Folders. I love the cartoon features of this stamp set and the sentiments are great for both Mum & Dad Super Hero's. 

Hope my cards have inspired you to get into your craft space and make all the Super Mother's in your life a handmade card or gift that's been made with Love.


Happy Crafting xx


Friday 24 February 2017

Whats behind the tree - Slider Card

I have made several slider cards in the past and just love them - in fact I love all cards with moving parts, pop ups etc. When I woke this morning I saw the wonderful Jennifer McGuire Ink had posted a new tutorial on slider cards. I love her technique of hiding the track. I used the supplies that I had on hand - eg she has a fantastic grass Die which I don't have so I improvised.


So here's my prototype. This is how is looks before pulling the tab. The balloons are floating above the tree. If you look close enough you can see something poking out of the left hand side of the tree.


Oh look it's a brown truck! And the sentiment is starting to reveal itself.


I have used the Tasty Trucks stamp set and masked it to make it a flat bed truck. The sentiments are from the Up & Away Bundle, and the tree is die cut from the Thoughtful Branches bundle. A few balloons punched and stamped using the Balloon Celebration bundle and some bakers twine. 

Jennifer's work is amazing and her tutorials are so inspiring and informative. She inspires me to get into my crafty space so hope this post does the same for you. 

Happy Crafting xx

Sew Some More

Before I put the ole girl (the sewing machine) away for proper this time, I just wanted to give these types of cards a quick whirl. Sewing Vellum over coloured punched shapes and then sewing the card front. 


So bright and bold and the concept has endless possibilities. 


The circles were punched from some scrap card stock in a variety of cheerful colours, then a layer of vellum cut slightly smaller than your card front goes directly over the top of the punched shapes and then sew around the edges - avoiding the circle punch outs. I used the Birthday sentiment & Pancake stamps from the Tasty Trucks Sale-a-bration set, cutting the circles and scalloped circle using the Layering Circles Framelits.


This card was made by folding a piece of velum in half (hence one edge did not require sewing). Next, I heat embossed the So Very Much "Thank You" stamp before filling with punched flowers. I then sewed three sides and adhered to cardbase using a sponge to apply Tombow.  Last but not least, I added a die cut butterfly from the Bold Butterfly Framelits, mainly to cover my wonky stitching in the corner, but thought it was a nice touch seeing the recipient is a female.

Hope I have inspired you to get your trusty sewing machine out and sew some cards.

Happy Crafting

Custom Tee


Look at these cute T Shirts!! They have been made using the Custom Tee Bundle, which is available in the Stamin' Up! 2017 Occasions Catalogue. The really awesome bonus about this Bundle, is it has a coordinating stamp set available as a free item from the Sale-a-bration promotion. For every $90 AUD spent during the promo, you choose a free item from the promo catalogue, BUT only till the end of March. Visit my store for details.

I haven't had a real decent play with this bundle yet but did manage to whip a few cards up as I wanted to see how the little tees looked using stamps from other sets.


I used the Hedgehog and Ladybugs from the Love You Lots Hostess Stamp Set and the Cat and Parrot are from the Pretty Kitty and Bella & Friends stamp sets. I stamped Black Archival ink onto Shimmery white card stock and used aqua painters to colour the animals, then let it dry before colouring the tee shirt backgrounds. Adhered with dimensionals the little tees pop right off the card.


I used to work in the retail clothing industry and making these little cuties reminded me of how many tees the staff and I would fold everyday. 


As you can see the options are limitless! And not one of these tees use the stamps from the bundle. I have yet to try those ones out. 


This card uses some DSP from the Sale-a-bration promotion, its called Carried Away and coordinates perfectly with the Up & Away bundle. But thought I would use a smidgen for this card as it required some Peakaboo Peach to match the colour of the ink used to water colour the T Shirt. The little cupcake is from Bella & Friends. The black and white DSP is from the Playful Palette Paper Stack, and I added some black and white Bakers Twine to match.


Using some more of the Carried Away DSP, I layered a quarter of the card front with Mint Macaron and adhered some pink Bakers Twine. The T Shirts have been stamped with the Hedgehog from Love you Lots stamp set and the Cat from Pretty Kitty. I used the Owl Punch to make the little hearts and the cloud die from Up & Away.


This card was made in a couple of minutes as I was using up scraps and die cuts I had sitting around. The flowers are from the Botanicals Builder Framelits, I also used the Layering Circles Framelits and DSP from the Cupcakes & Carousels DSP Paper Stack. The T Shirt was stamped in Black Archival using the Ladybugs from the Love You Lots Hostess stamp set and coloured in using an aqua painter and Daffodil Delight and Real Red inks.

Happy Crafting x


Wednesday 22 February 2017

Sew some card fronts

I pulled out my sewing machine today, thank goodness it has a dust cover as it hadn't seen the light of day for over a year. Plus, to be honest I couldn't find the cord after one of my clean ups. I have been wanting to try sewing on card fronts again, as its been awhile. 


Just don't look to close, most of them don't have the straightest stitching lines lol. By the time I got to the fourth card, the machine and I had bonded, and then it was time to pack it up and put everything away, hopefully not for another year this time.


For this card I used the Ferris Wheel from the Cupcakes and Carousels Stamp set, stamped with Black Archival ink directly onto a piece of Falling in Love DSP. I absolutely adore the bokeh effect on this DSP.


I use the word Gorgeous a lot in my everyday speech, so of course I just had to get the Beautiful You stamp set so I could get my hands on it. The black hearts are from the Sealed with Love bundle, raised using dimensionals to match the height of the sentiment. The four hearts are heat embossed in gold on black cardstock.


Check out the stitching lines on this little puppy lol. This was the fourth card so my skills had improved by this stage. I kept this card very basic, using Whisper White, Sahara Sand and Black card stock. The card front has been embossed with the new Hexagons TEIF, added a Doilie and a few pearls. The Flower is from the Sale-a-Bration stamp set called Avant Garden. Stamped in Black Archival on Sahara Sand and coloured using White Craft Ink and an aqua painter. I then fussy cut the flower and adhered to the circle cut from a piece of Sahara Sand that has been stamped with White Craft Ink and the Woodgrain Background stamp.


The sentiment "Best Wishes" is from the Blooms & Wishes stamp set. I used the Triple Banner Punch to make the little banner.
 

This card would get me employee of the month at Willie Wonkers sewing factory! The van is from the Sale-a-Bration stamp set called Tasty Trucks. I have used some DSP from the Cupcakes & Carousels Paper Stack and the die cut heart is made using Blushing Bride Cardstock and the Love Notes Framelits.


The little Truck has been coloured using an aqua painter with Daffodil Delight, Pool Party and Pink Pirouette inks.


Another card using the same coloured inks and a piece of DSP from the Cupcakes & Carousels Paper Stack. I probably over did the sewing on this one, but I wanted to do as much as I could while I had the sewing machine out, give the old girl a decent run around the block before she gets covered and forgotten about again - gosh I really hope not!


Well that's it for this post. Machine is away and its time to make dinner. Hope you get to make some YOU time today. Time just for you to relax and perhaps create something wonderful in your craft space.
 
Happy Crafting xx


Tuesday 21 February 2017

Sponged Sunset Backgrounds


Tried my hand at sponging sunset scenes again recently. I love playing with my ink pads and sponges,  and it's such an easy technique - I often make these backgrounds with no card in mind, I just pop them away until the right stamp set comes along that needs a sunset lol.

A couple of important things that will ensure your sponging efforts are not just blobs of ink smooched onto paper
  • Use card stock that is ideal for blending inks - something with smooth coated surfaces. I use Stampin'Up' Shimmery White card stock as it is great for blending, sponging and light watercolouring. Plus it has a gorgeous shimmer when it catches the light it sparkles 
  • Key is to apply light layers and work your way upto the desired depth. 
  • Always sponge on to scrap paper after collecting ink on your sponge, yes, every single time you re-ink your sponge, if you don't then you get the yucky blotches. 
  • Always use a circular motion when apply sponge to card stock and keep it moving. 
  • Always start sponging in circular motions off the card stock, keep motion going as you approach card stock from edges. If masking start with sponge on mask and work your way off it. 
 

The above card was inspired by Kimber Kreations. Her sponging skills are seriously out of this world! I don't have a lot of foliage stamp sets....working on that lol, but used what I had. 

Moon was masked using post it notes and a large circle die. I took the lady from the Beautiful You stamp set and measured where I wanted her in the moon and where her feet landed to gauge where to mask the horizon. Start off by sponging the lightest colour first - Soft Sky around the masked moon.  Then Pool Party, Marina Mist, Dapper Denim and Night of Navy. 

Remove moon mask and lightly sponge the moon with Softy Sky. Take the stark white away with cloud like effects. 

Mask horizon. I used Night of Navy ink and sponged along the mask to create horizon line. Also bring some of the darker ink colours used on the side, down above 
the horizon line you just sponged.

I stamped the lady twice. Once on the card front and the other on the polka dot DSP. Fussy cut the DSP stamped image as close to the stamp line as possible even removing the slightest layer if your skills are on point. Before apply her polka dot fussy cut "dress and hat". Stamp and sponge the foliage. Then glue her clothing onto the stamped lady on the card front. I used a white gel pen to put reflection swirls in the water and for the little details on the plants.


This card uses the same technique but with a splash of colour. The sun and horizon were masked at the same time. Then the sun mask was removed and placed directly  underneath the horizon line before sponging the water. Daffodil Delight, Peakaboo Peach and Flirty Flamingo were used to sponge the sun and horizon. Any array of blues can be used for the sea and sky just start with light to dark.

The waves on the water in this card was achieved by taking a small paint brush, lightly spritzing with water and with full fast horizontal strokes run across your inked sea. Better to have brush with minimal water on it as it removes the ink you just applied so becareful.


This one uses the same techniques. I wanted to try the Palm Tree idea that Amanda Bates had used for the Avant Garden Flowers as I don't have a Palm tree stamp. It worked a treat. Love getting versatily out of my stamp sets. I then die cut the word "love" from the Sunshine Wishes bundle and replaced the stamped word "smiles" from the sentiment in the Up and Away Bundle.

Happy Crafting xx